MP3 to MP4 Converter with Image: A Marketer's Guide
Jump to a section
You already have the asset. It's the founder read, the customer testimonial, the podcast pull quote, the promo spot, or the voiceover your team approved last week. The problem isn't the message. The problem is distribution.
Meta, TikTok, YouTube, and most paid social placements expect video. An audio file by itself can't carry the visual layer those placements are built around, so marketers end up with usable content trapped in the wrong format. That's why a good MP3 to MP4 converter with image workflow matters. It turns audio into something ad platforms can run, review, and scale.
For one-off needs, that can be a fast browser tool. For repeatable production, it usually means FFmpeg or a desktop app with presets and queues. The right choice depends less on “what can convert this file” and more on how many variants you need, how much control your team requires, and whether you're building for a single upload or a real testing pipeline.
Turning Audio Assets into Scroll-Stopping Video Ads
A media buyer has an approved voiceover at 10 a.m. The campaign needs fresh creative by lunch. There is no edit bay, no shoot, and no time to cut live footage. Pairing that MP3 with the right image and exporting it as MP4 is often the fastest way to turn a stalled asset into something ad platforms can review, serve, and test.
The technical point is simple. MP3 files can't store or embed images, so the job is to package the audio with a visual track inside an MP4. That visual can be a founder still, product image, testimonial frame, branded card, or a lightly animated background. What matters is that the result behaves like video, which gives your team a usable base for paid social placements.
Why this matters for performance teams
For ad ops and creative teams, this is less about file conversion and more about production efficiency.
A static-image MP4 does three jobs well:
- Gets audio into video-only placements so approved messaging can run.
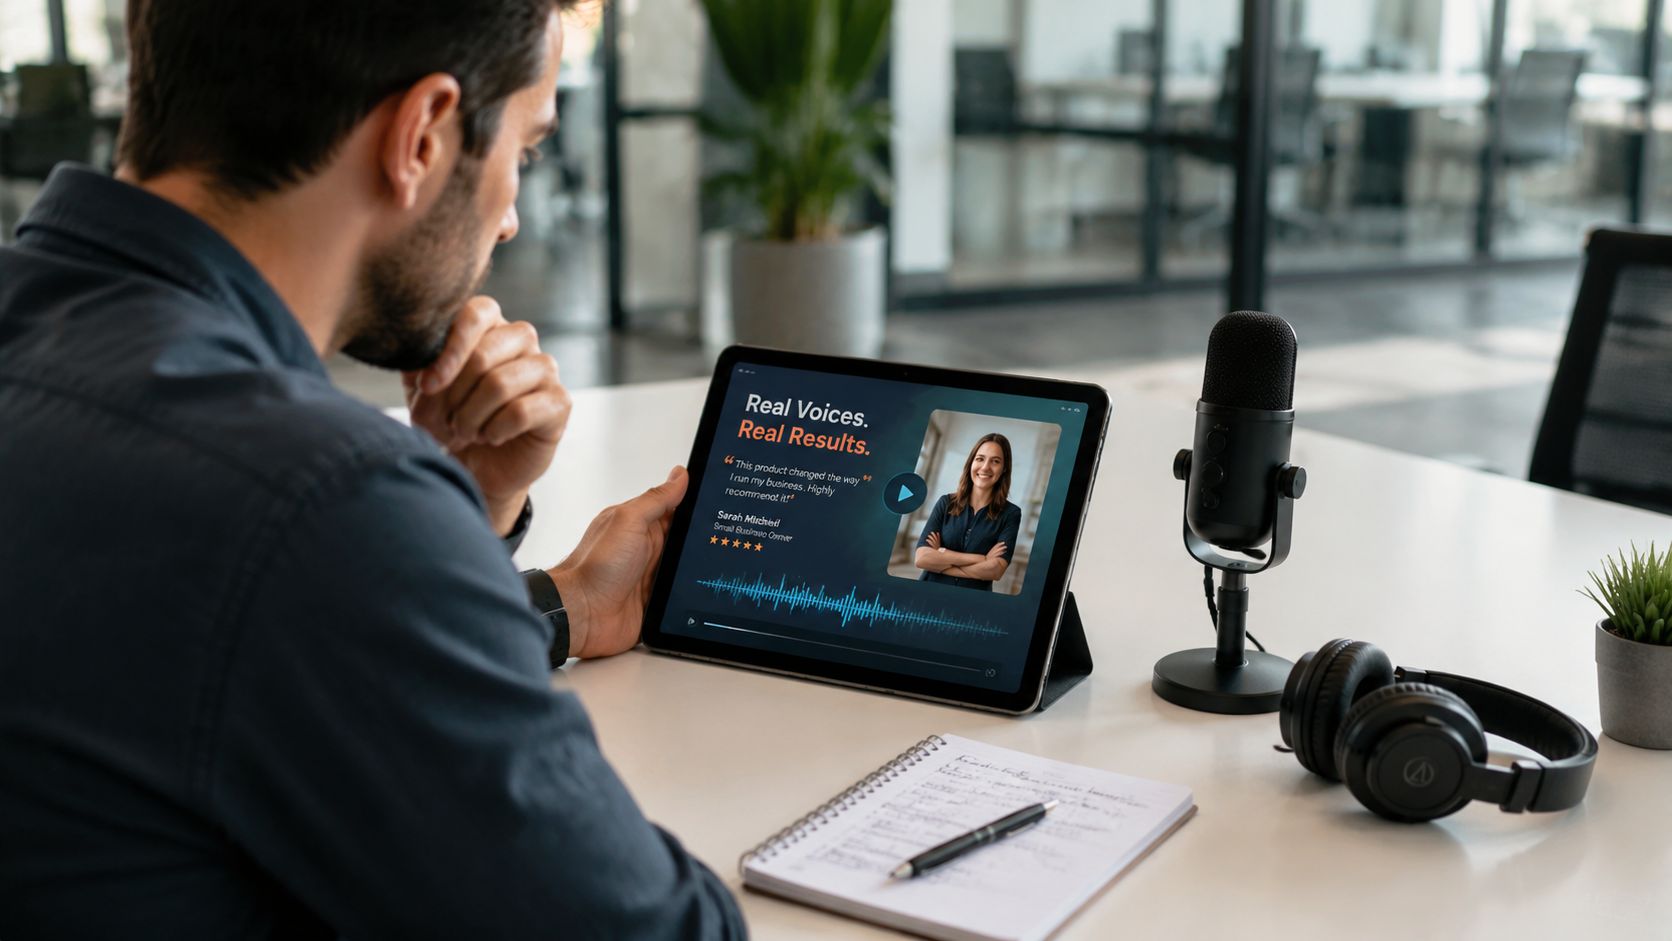
- Keeps a visual anchor on screen such as a face, logo, product, or offer card while the audio does the persuasion.
- Creates a repeatable starting point for captions, hooks, CTAs, and aspect-ratio variants.
That third point is where the workflow starts paying off. Once an audio asset lives inside an MP4, the team can spin out multiple versions without asking for a new recording every time. One podcast snippet can become a square retargeting ad, a 9:16 TikTok test, and a YouTube companion variation with different headlines and opening frames. If that is the production model, this guide on turning podcast clips into video ads shows how to structure those variations around a single source asset.
Speed matters, but so does control. The first version only needs to be good enough to test the message. The next versions can improve thumb-stop rate, branding, and fit by placement.
What to put on screen
Choose the image based on the job the ad needs to do.
Use a founder or customer still when credibility is the priority. Use packaging, UI, or a product close-up when fast recognition matters more than personality. Use branded templates when the team is producing many offer variations and needs consistency across campaigns.
Static does not have to mean lifeless. A subtle zoom, clean captions, waveform, or background motion is often enough to make the asset feel native to feed environments without slowing production. For teams testing richer treatments without a full edit cycle, tools for uncensored creative AI video generation can help turn a basic audio-plus-image export into a more polished ad variation.
The practical rule is straightforward. If the script or testimonial is already working, wrap it in a visual system your team can reproduce quickly, then test more versions instead of waiting for perfect production.
The Fastest Route with Online Converters
A media buyer has a winning audio clip at 10:15 a.m. By noon, that clip needs to exist as a TikTok draft, a Meta feed variant, and a YouTube backup creative. In that situation, browser converters are useful because they compress the first production step into a few clicks.
You drop in the MP3, add a still image, export an MP4, and get something the team can review fast. That speed matters when the actual goal is not perfect post-production. The goal is to validate whether the message deserves more versions.
Where online converters work well
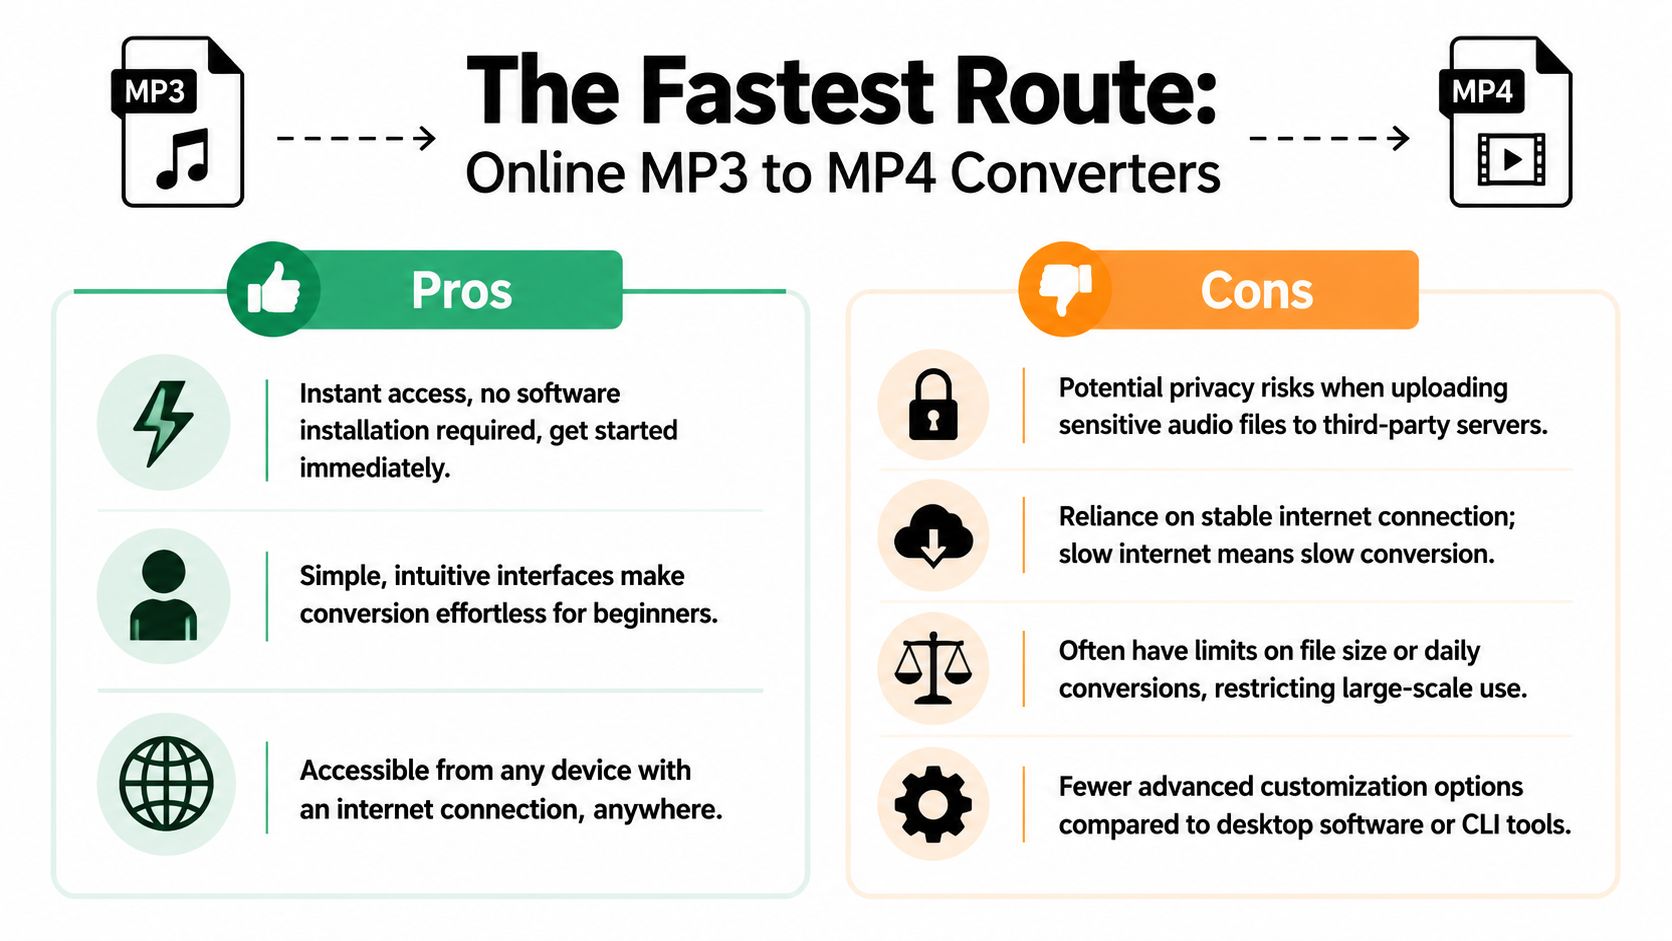
Online converters are a strong fit for short-turn work:
- Stakeholder review files when a team needs to approve message and basic visual treatment.
- Fast launch prep for one-off ads that need an MP4 wrapper before trafficking.
- Creative triage when several hooks need quick packaging before deeper editing.
- Cross-functional handoff when paid social managers, founders, or account teams need a tool they can use without training.
That use case is narrow, but real. For early-stage testing, speed often beats precision. If a testimonial, offer read, or podcast clip is still proving itself, the fastest workflow usually wins because it gets more variations into review without tying up an editor.
Some browser tools also reduce privacy risk by processing locally instead of relying entirely on server-side uploads. That matters when the asset contains unreleased campaign material, customer voiceover, or licensed audio your team does not want moving through another vendor's storage layer.
The trade-offs that show up fast
The problem starts when quick conversion turns into a repeatable production habit.
Online tools rarely give enough visibility into export settings, image treatment, or how the final file was assembled. That creates friction once paid spend is involved, because ad teams need outputs that behave predictably across placements, aspect ratios, and approval rounds. A file that looks acceptable for review can still create problems later if framing is off, the encode is inefficient, or the asset has to be rebuilt manually for every new variation.
Convenience is useful. Manual repetition is expensive.
Common issues show up quickly:
- Inconsistent branding when each export depends on manual image selection and default settings.
- Limited output control over frame rate, canvas size, codec choices, and duration behavior.
- Queue and connection delays that make urgent production less reliable than it first appears.
- Asset handling concerns when sensitive files must be uploaded to a third-party service.
- No real batch workflow for turning one audio source into multiple ad variants at scale.
Those limits matter more in performance marketing than they do in casual content creation. A team testing five offers across three platforms is not solving for one finished file. It is building a repeatable way to generate many acceptable files, fast, with minimal rework.
The right way to use them
Use browser converters as an intake layer. They are good for first-pass assets, review links, and rough ad-shaped exports that help a team decide what deserves full production.
Once a concept gets traction, move it into a process that can produce consistent variants on demand. Teams that are planning that shift should review this guide to an automatic video maker workflow for scalable creative production, because it maps the point where quick conversion stops being efficient and a system starts saving real time.
Full Control and Automation with FFmpeg
If online converters solve urgency, FFmpeg solves throughput. It's the most practical option when you need repeatable outputs, file-level control, and a path to automation.
For marketers, a key advantage isn't that FFmpeg is technical. It's that once you define the right command, your team can run the same process across dozens or hundreds of assets without relying on a click-by-click interface. That's how you turn a one-off conversion habit into a production system.

What FFmpeg is actually doing
A lot of people talk about “converting MP3 to MP4” as if the audio changes formats in a meaningful way. In the most efficient workflow, the audio often doesn't need to change much at all. The job is to place the audio inside a video container and create a visual stream from a still image.
The standard method described in practitioner discussions is really remuxing the audio into a video container while stretching a JPEG or PNG across the audio duration and encoding that image as H.264 video frames, often at 24 FPS. In that workflow, the MP3 audio can pass through without re-encoding, which preserves the original audio quality. That same discussion also notes a common amateur failure point: incorrect duration matching can cause audio-video desync, and image path misconfiguration is a recurring source of automated FFmpeg failures in batch work, as detailed in this Reddit technical discussion on making MP4s from MP3 plus image.
That's the reason FFmpeg is valuable. It lets you specify the behavior instead of hoping a template guessed correctly.
A solid starter command
Here's a practical baseline:
ffmpeg -loop 1 -i cover.jpg -i audio.mp3 -c:v libx264 -tune stillimage -r 24 -c:a copy -shortest output.mp4
Each flag has a job:
-loop 1tells FFmpeg to keep showing the image.-i cover.jpgis the visual input.-i audio.mp3is the soundtrack.-c:v libx264encodes the visual track as H.264, which is widely accepted by ad platforms.-tune stillimageoptimizes the encode for static visuals.-r 24creates a standard frame cadence for the still-image video track.-c:a copykeeps the MP3 audio as-is instead of re-encoding it.-shortestmakes the output stop when the shorter input ends, which helps avoid overrun problems.
If you're producing ad variants at scale, the best command is the one your team can run the same way every time.
Why this scales better than manual tools
FFmpeg becomes powerful when you stop thinking in single exports.
A paid social team can batch through folders of testimonials, founder reads, or podcast segments using naming conventions and scripts. One folder holds audio, one holds cover art, and the script outputs channel-ready MP4s with a consistent format. That consistency matters when multiple buyers, editors, and account managers are shipping creative into the same ad account.
You also get a clean path into batch scripting. A shell script or simple automation wrapper can process entire backlogs while the team works on copy, hooks, or landing pages.
For teams managing upload requirements across channels, this reference on asset formats and requirements is useful because it helps define a standard output before you automate around it.
A quick visual walkthrough can help if your team is new to command-line media processing:
Where teams usually break the workflow
Most FFmpeg issues are boring, not advanced. Wrong file names, broken paths, image assets exported at awkward dimensions, or inconsistent folder structures cause more trouble than the command itself.
A few habits prevent most of that:
- Standardize file naming so audio and image assets match predictably.
- Keep one output recipe per channel group instead of tweaking flags every time.
- Test a small batch first before processing a large backlog.
- Lock the visual template so every export doesn't become a creative debate.
FFmpeg isn't the prettiest option, but it's the most dependable once volume enters the picture.
Building Reliable Workflows with Desktop Apps
Desktop apps are the middle lane. They give you more control than web converters and far less operational friction than command line work. For many in-house teams, that's the best trade.
This is the category to use when the workflow needs to be reliable, teachable, and repeatable by more than one person. A designer, media buyer, and producer can all work inside a desktop interface without handing every conversion request to the most technical person on the team.
Where desktop tools fit best
Desktop software makes sense when you need:
- Saved presets for recurring formats like square, vertical, and widescreen
- Batch queues so exports can run in the background
- Visual confirmation that the image framing and timing look right
- Basic editing before export, such as trimming dead air or adding title cards
The specific app matters less than the workflow discipline. HandBrake, VLC, and lightweight video editors can all handle this role if you set them up around templates instead of ad hoc exports.
Comparing the practical options
Here's how the common desktop paths tend to feel in real use.
| Tool type | Best use | Strength | Limitation |
|---|---|---|---|
| Basic converter app | Fast, repeatable exports | Simple interface and easy onboarding | Less flexible for layered edits |
| VLC-style utility workflow | Utility-driven conversions | Familiar and widely available | Interface can feel indirect for ad production |
| Lightweight video editor | Branded ad-ready outputs | Better control over text, layout, and framing | Slower than a pure conversion tool |
| HandBrake-style preset workflow | Consistent encoding outputs | Great for saved settings and queueing | Not designed around creative assembly |
The winning move is usually to create channel-specific presets and stop reinventing export settings. One preset for vertical social. One for square feed. One for horizontal placements. The team then works from approved containers instead of memory.
Save presets like media buying rules, not editing preferences. If the output target is stable, the production step gets faster every week.
What makes desktop apps reliable
Reliability comes from reducing choices at the moment of export.
A good setup might look like this:
- One master canvas per placement family
- One approved image treatment for static audio ads
- One caption style for spoken-word creative
- A queue-based export habit so multiple files process without supervision
That structure matters when you're producing variants. Without it, every request turns into “which resolution should I use” and “why does this file look different from the last one.”
If your team is weighing editor-centric workflows against purpose-built tools, this guide to video production software comparison is a useful way to think about fit by team size, complexity, and output volume.
Desktop is often the best compromise
A lot of teams don't need full FFmpeg automation. They need consistency without complexity.
Desktop software is where that usually lands. It gives enough control to protect quality and enough usability to avoid bottlenecking the team around one operator. For agencies and internal creative teams with recurring ad production, that's often the most durable setup.
Optimizing Your New Video for Ad Platforms
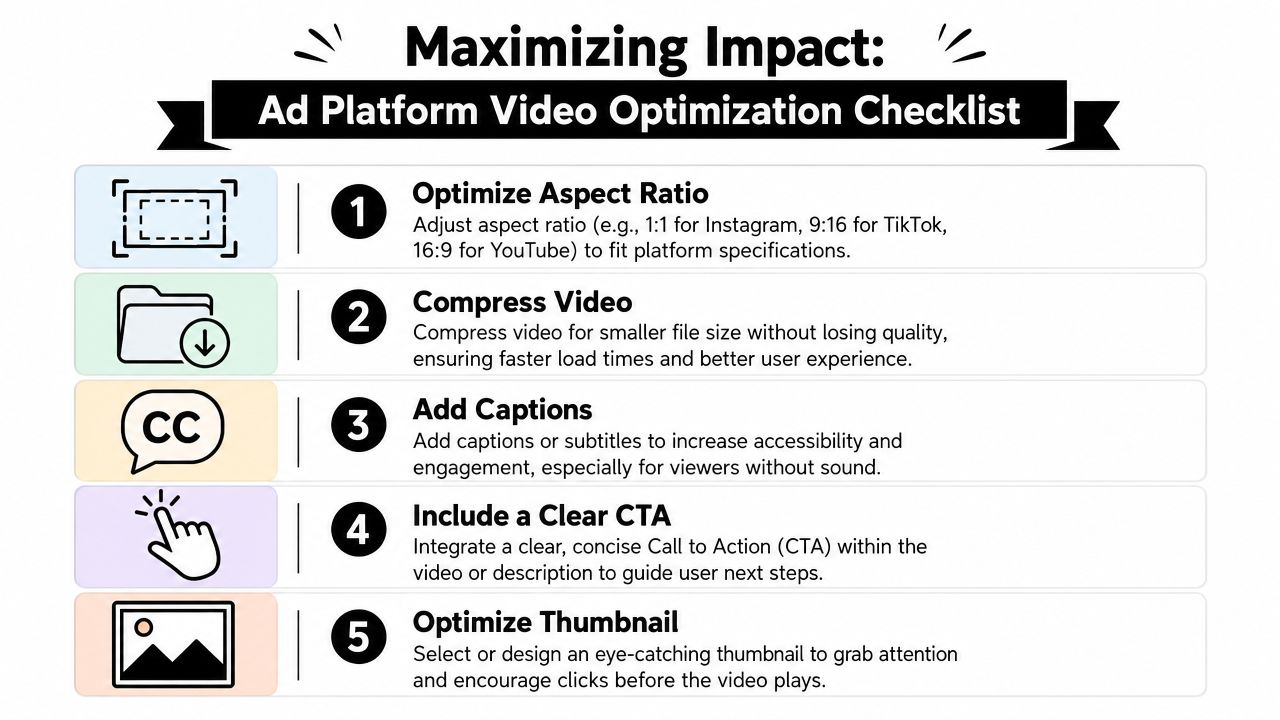
Making the file is step one. Making it platform-ready is what determines whether it feels like a polished ad asset or a placeholder.
Most weak audio-to-video outputs fail in predictable ways. The image is framed poorly, the text gets cropped, the audio was unnecessarily re-encoded, or the file technically works but doesn't feel native to the placement. If you want a MP3 to MP4 converter with image workflow that supports paid distribution, optimization can't be an afterthought.
Protect the audio first
For spoken-word ads, testimonial clips, and podcast segments, sound quality carries the message. If the audio already sounds right, don't degrade it just because you're adding a visual wrapper.
That's why remux-style handling matters. One industry gap highlighted in mainstream converter coverage is the lack of guidance around preserving original audio and metadata during audio-to-video conversion. Kapwing's conversion page is cited in verified data as part of that gap, which notes that 68% of podcasters lose metadata such as artist, title, and episode info when converting audio to video for YouTube, while remux-style FFmpeg approaches can preserve the original MP3 without re-encoding in ways many mainstream tutorials don't explain, according to this verified reference tied to Kapwing's MP3 to MP4 page.
If your team publishes podcasts, interviews, or serialized content, that's not a minor issue. Metadata loss creates cleanup work downstream, especially when assets are reused across channels and libraries.
Use this rule in production
- Keep the original audio untouched when possible
- Avoid unnecessary transcodes
- Check metadata after export if the asset will live beyond a single ad upload
- Treat spoken-word clarity as part of creative quality, not just a technical setting
Format for the placement, not for convenience
One visual can be repurposed into multiple placements, but only if you plan the frame correctly. The same cover art won't behave the same way in a square feed placement, a vertical story, and a YouTube player.
The safest workflow is to create separate layout presets for each environment. Keep logos, titles, and speaker names away from edges. Leave room for UI overlays and caption blocks. If a team ignores this and just stretches one image everywhere, the result usually looks like recycled creative.
A good reference point for planning those outputs is this guide to social media video specs, especially when your team is pushing the same base asset into multiple placements.
The file can be technically valid and still be a weak ad. Platform fit is part of production quality.
Add captions and on-screen hierarchy
Audio-led creative often gets consumed in environments where sound isn't guaranteed. Even when the platform autoplays with audio available, many users rely on visual reinforcement.
Captions do more than improve accessibility. They help the viewer lock onto the message quickly, especially if the first line carries the hook. Pair that with a simple text hierarchy:
- Primary hook near the top or center-safe area
- Speaker or source label if credibility matters
- CTA or end card near the close
Keep the design restrained. A static-image video doesn't need aggressive motion graphics to work. It needs a clear message path.
Choose encoding settings that keep things boring
For ad delivery, boring is good. Boring means compatible, consistent, and easy to review.
A practical default is H.264 for the video layer. That format is widely supported and pairs cleanly with still-image outputs. Use image assets that are already clean and sharp before they enter the conversion step. If the source image is weak, no export setting will save it.
Watch for these failure modes:
- Black backgrounds when the tool failed to embed the intended visual correctly
- Mismatched duration that creates awkward endings or sync issues
- Image scaling problems that blur logos or product shots
- Default app settings that bypass the image step entirely
Those issues come up often in rushed workflows, especially when teams trust mobile apps or simplistic converters too much.
Optimize for creative testing, not just publishing
If you're running ads, don't stop at one polished export. Build a modular system around the same audio source.
That can mean changing:
- The opening frame
- The image treatment
- The headline overlay
- The CTA card
- The aspect ratio by placement
The conversion step moves beyond mere technicality to become strategically useful. One approved audio clip can produce several distinct visual wrappers, each aligned to a different audience, offer angle, or platform environment.
If your broader goal is to grow your social media audience, this kind of systematic variation matters because it helps you learn which visual context makes the same spoken message travel further.
Choosing Your Ideal Conversion Workflow
The best workflow depends on what you're optimizing for. Speed, control, and scalability don't usually peak in the same tool.
If you only need a quick proof of concept, an online converter is usually enough. If you need repeatable outputs with minimal training overhead, desktop apps are the strongest middle ground. If you're producing large volumes of ad variants or want automation, FFmpeg is the clear long-term choice.
MP3 to MP4 Conversion Method Comparison
| Method | Best For | Speed | Quality Control | Scalability |
|---|---|---|---|---|
| Online converters | One-off exports, previews, urgent uploads | Fastest to start | Low to moderate | Low |
| Desktop apps | Repeatable team workflows, presets, queue-based production | Fast once configured | Moderate to high | Moderate |
| FFmpeg | Batch processing, automation, high-volume creative systems | Fast after setup | High | High |
A simple way to choose:
- Use online converters when the file just needs to exist quickly.
- Use desktop apps when multiple teammates need a dependable process.
- Use FFmpeg when conversion is part of a larger ad production pipeline and volume is paramount.
The strategic shift is to stop treating this as a file-format chore. It's a packaging layer for creative distribution. Once you see it that way, the right method becomes obvious. You're not merely turning MP3 into MP4. You're turning underused audio into testable video inventory.
If your team is trying to scale that process beyond one-off conversions, Sovran helps performance marketers turn existing creative assets into structured, high-volume video testing workflows, so you can produce and launch more ad variations without slowing down your team.

Manson Chen
Founder, Sovran
Related Articles
Storyboard Development: Scale Video Ad Production in 2026

8 Pattern Interrupt Techniques for Video Ads